Master Amazon SEO in 2026 with proven tactics from CMO's fractional Amazon experts. Covers A9 algorithm, behavioral ranking, keywords, and listing optimization.
Amazon product images drive clicks and conversions. Learn why visuals are your most powerful selling tool and how CMO creates images that win the buy box.

Amazon Rufus is an AI shopping assistant changing how products get discovered. Here's what every brand must do now to stay visible in AI-driven search results.
Amazon's 2026 fee structure changed on January 15. Learn what shifted, what it costs your brand, and how a fractional Amazon agency protects your margins.
Amazon's algorithm now rewards conversion behavior over keyword stuffing. Learn how CMO helps brands adapt their listings and ads to rank for what actually sells.
As Amazon automates more, brand authenticity is your edge. Learn how top consumer brands stand out in AI-driven search and convert at higher rates with CMO.
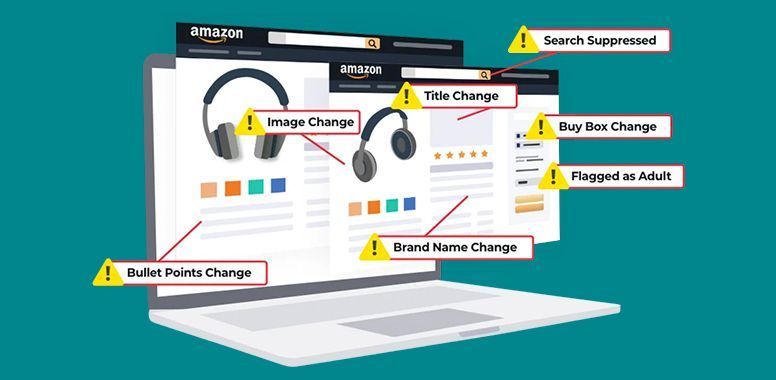
Suppressed Amazon listings kill revenue. Learn how CMO uses catalog data to recover visibility, fix compliance issues, and restore sales momentum fast.
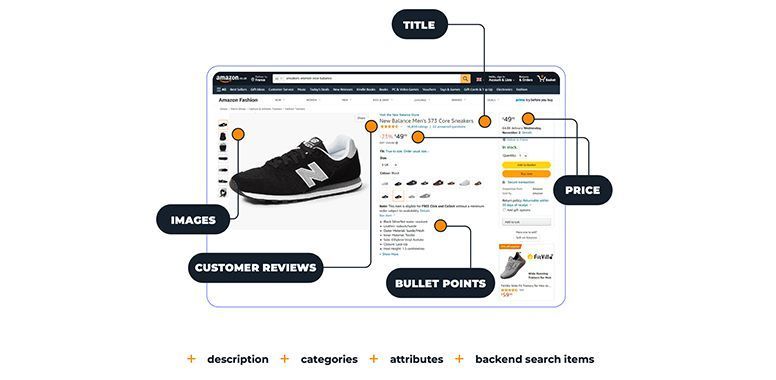
Clean Amazon catalog data is the hidden driver of search rankings. Learn how accurate titles, attributes, and browse nodes improve your listing performance.

Amazon PPC drives immediate, measurable results. Learn how CMO structures Sponsored Products, Sponsored Brands, and Sponsored Display campaigns that scale profitably.
Shoppers in 2026 buy with intention. Learn how CMO optimizes Amazon listings to attract high-intent buyers who convert, repeat, and build brand loyalty.


